If you are planning a ductless system for your home, one of the first questions you may have is how long the installation will actually take. The ductless HVAC installation timeline GTA homeowners experience can vary depending on the number of indoor units, system type, property layout, wall materials, electrical requirements, and how complex the refrigerant line routing will be. A straightforward single-zone installation may be completed relatively quickly, while a multi-zone system serving several rooms can take longer because more equipment, wiring, drainage, and testing are involved.
At Go Ductless Inc., we help homeowners across the GTA understand the installation process before work begins so there are fewer surprises. The ductless HVAC installation timeline GTA projects follow usually includes a home assessment, equipment planning, indoor and outdoor unit placement, line routing, electrical work, pressure testing, vacuuming, commissioning, and homeowner training. This guide explains each stage, what can speed up or slow down a project, and how to prepare your home so the installation is completed efficiently without sacrificing quality.
What Is The Typical Ductless HVAC Installation Timeline GTA Homeowners Can Expect?
For many single-zone projects, the ductless HVAC installation timeline GTA homeowners see may fit within one working day when the indoor and outdoor units are close together, electrical access is straightforward, and no major structural obstacles are present. The installation still involves several important steps, including mounting the indoor unit, positioning the outdoor unit, drilling a small wall opening, routing refrigerant lines, setting up drainage, completing electrical connections, pressure testing the system, vacuuming the refrigerant circuit, and verifying operation. Even when the physical installation looks simple, these technical steps should not be rushed.
Multi-zone projects usually take longer because every additional indoor unit adds its own mounting location, line set, drain plan, communication wiring, and commissioning requirements. The ductless HVAC installation timeline GTA for a two-zone or three-zone system may extend beyond one day, especially when units are spread across multiple floors or when line routing must work around finished rooms. Go Ductless Inc. focuses on completing each stage properly rather than promising an unrealistic timeline that could compromise comfort, reliability, or appearance.
Single-Zone Installations
A single-zone project is usually the fastest type of ductless installation because it involves one indoor unit and one outdoor unit. The ductless HVAC installation timeline GTA for a Mini Split serving a bedroom, home office, basement, or addition is often shorter because the line set route is simpler and there is only one zone to commission. However, wall material, electrical needs, and outdoor mounting conditions can still affect the total time.
Why The Home Assessment Happens Before Installation Day
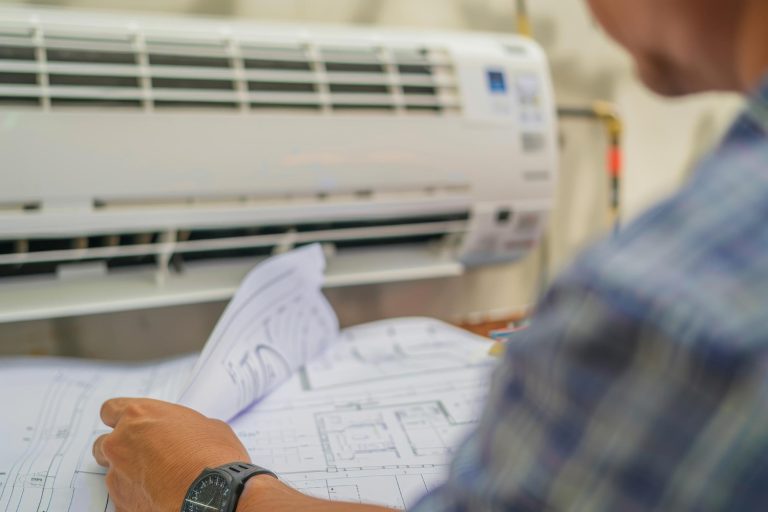
A proper home assessment is an essential part of the ductless HVAC installation timeline GTA because it allows the installer to identify potential issues before tools and equipment arrive. During this assessment, the contractor should review room size, insulation, ceiling height, window exposure, existing heating and cooling equipment, available wall space, electrical capacity, and possible indoor and outdoor unit locations. This information helps determine system size and whether the home needs a single-zone Mini Split, multi-zone configuration, Ductless Air Conditioning solution, or Ductless Heat Pump setup.
This planning stage can save significant time during the actual installation. When line routes, drainage paths, outdoor unit location, and electrical requirements are already confirmed, the crew can work with a clear plan instead of making major decisions on site. A well-prepared ductless HVAC installation timeline GTA project is usually smoother because equipment selection and placement issues are resolved in advance rather than becoming unexpected delays after the installation begins.
Load Calculations And Zone Planning
Zone planning is especially important for homes with multiple bedrooms, finished basements, additions, or separate floors. The contractor should determine which rooms can share a zone and which need independent control. A thoughtful ductless HVAC installation timeline GTA begins with this design step because incorrect zone planning can lead to comfort problems even if the installation itself is completed quickly.
Step 1: Preparing The Indoor Unit Location
The first physical stage of a ductless HVAC installation timeline GTA project often involves preparing the indoor unit location. Wall-mounted units are generally installed high enough to distribute air effectively throughout the room while leaving adequate clearance around the equipment. The mounting plate must be secured properly, and the installer should verify that the unit will not be blocked by furniture, curtains, shelving, or other obstacles.
Placement is also important for day-to-day comfort. In bedrooms, indoor units should generally avoid blowing directly toward the bed. In home offices, airflow should not constantly hit the desk or seating position. A careful ductless HVAC installation timeline GTA includes enough time to confirm these details because changing the position after drilling and line routing begins can create delays and unnecessary wall repairs.
Wall Type Can Affect Installation Time
Drywall is usually straightforward to work with, while brick, concrete, stone, or other dense materials may require specialized drilling equipment and additional labour. This is one reason the ductless HVAC installation timeline GTA can vary significantly between two homes even when both are installing the same equipment.
Step 2: Installing The Outdoor Unit
The outdoor unit must be installed in a location with adequate airflow, stable support, and good service access. Depending on the home, it may be installed on a ground pad, raised stand, or approved wall bracket. The ductless HVAC installation timeline GTA can be shorter when the outdoor location is level, easily accessible, and close to the indoor unit, while difficult wall mounting or long routing distances may increase the installation time.
Winter operation also needs to be considered if the system is a heat pump. The outdoor unit should be positioned where snow buildup, drainage, landscaping, fences, and stored items are unlikely to restrict airflow. A professional ductless HVAC installation timeline GTA project includes time to secure the unit properly and make sure future service technicians can access it without difficulty.
Outdoor Access Matters
Tight side yards, elevated locations, difficult landscaping, or crowded equipment areas can slow down outdoor installation. Good planning during the assessment helps prevent these issues from becoming major delays on installation day.
Step 3: Refrigerant Line Routing
Refrigerant lines connect the indoor and outdoor units and allow heat to move between them. This stage can have a major effect on the ductless HVAC installation timeline GTA because line routing may be simple in one home and complicated in another. Short, direct runs are usually faster, while long routes through basements, multiple floors, finished walls, or around architectural features can take considerably more time.
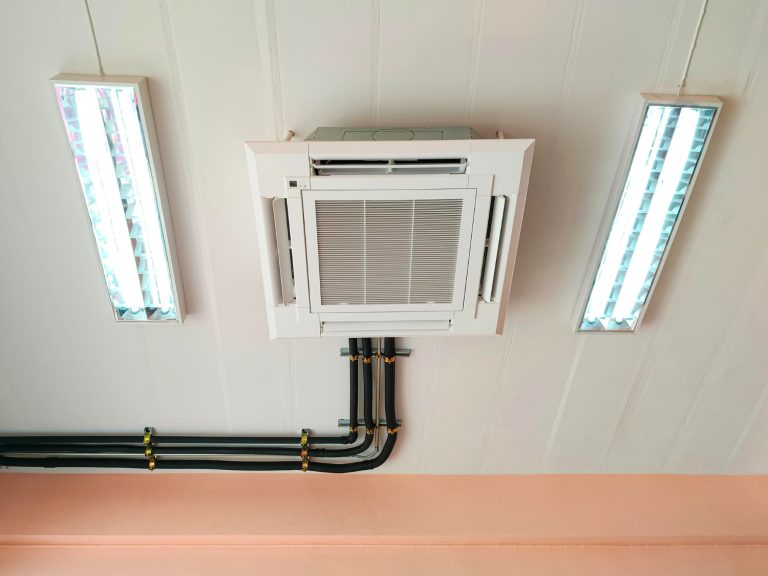
A professional installation should also consider appearance and future accessibility. Exterior line covers are commonly used to protect refrigerant piping and create a cleaner finished look. For multi-zone systems, several line sets may need to travel from different indoor units to one outdoor unit. This makes the ductless HVAC installation timeline GTA longer because each route must be carefully planned, secured, insulated, and connected.
Why Clean Routing Matters
Fast installation is not useful if the line routing looks poor or creates future service problems. A good ductless HVAC installation timeline GTA allows time for clean, protected routing that supports both performance and appearance.
Step 4: Condensate Drainage
During cooling, the indoor unit removes moisture from the air, and that water must drain away safely. Condensate drainage is an important part of the ductless HVAC installation timeline GTA because the drain line must have the correct slope and discharge location. Gravity drainage is typically preferred when the layout allows it, because it is simple and reliable.
In some installations, gravity drainage is not practical, so a condensate pump may be required. Installing and testing a pump adds time to the project and introduces another component that must remain accessible for future service. A properly planned ductless HVAC installation timeline GTA includes enough time to make sure drainage works correctly before the crew leaves because poor drainage can lead to leaks, stains, odours, or water damage.
Drainage Testing
The technician should confirm that condensate can move safely away from the indoor unit. Drainage testing is a small but essential part of the overall installation process.
Step 5: Electrical Work
Most ductless systems require a dedicated electrical circuit, proper breaker protection, outdoor disconnect, and communication wiring between components. Electrical work can influence the ductless HVAC installation timeline GTA significantly, especially in older homes with limited panel capacity or long wiring routes. If electrical requirements are identified during the initial assessment, the necessary work can often be planned before installation day.
A simple electrical setup may add relatively little time, while a panel upgrade, new circuit route, or difficult access can extend the project. Homeowners should ask whether electrical work is included in the quote and whether a licensed electrical professional will be involved where required. A realistic ductless HVAC installation timeline GTA should account for this work rather than treating electricity as an afterthought.
Older Electrical Panels
Older GTA homes may have panels that need closer review before adding new HVAC equipment. Identifying these conditions early helps prevent the installation from stopping midway while electrical issues are resolved.
List Of Factors That Can Change Installation Time
No two properties are exactly the same, which is why the ductless HVAC installation timeline GTA can vary even when homeowners choose similar equipment. The number of zones matters, but building materials, access, electrical conditions, and routing complexity can be equally important.
Common factors that may extend the installation timeline include:
- Multiple indoor units on different floors
- Brick, concrete, or stone exterior walls
- Long refrigerant line routes
- Electrical panel upgrades
- Condensate pumps
- Difficult outdoor unit access
- Custom brackets or raised outdoor stands
- Finished spaces that require careful routing
Step 6: Pressure Testing And Vacuuming
After the refrigerant lines are connected, the system should be pressure tested to confirm that the field connections do not leak. This stage is essential to a professional ductless HVAC installation timeline GTA because refrigerant leaks can reduce performance and cause future service problems. The technician uses appropriate testing methods before the system is placed into regular operation.
The refrigerant circuit is then evacuated with a vacuum pump to remove air and moisture. This process should not be skipped or rushed. Moisture inside the refrigerant circuit can harm system performance and reliability. A quality ductless HVAC installation timeline GTA includes enough time for proper evacuation and verification before the system is started.
Why Vacuuming Is Important
Vacuuming protects the refrigerant circuit from unwanted moisture and air. If an installer promises an unusually fast installation but does not explain pressure testing and evacuation, homeowners should ask how these essential steps will be handled.
Step 7: Startup And Commissioning
Once the mechanical and electrical work is complete, the system is started and commissioned. Commissioning is one of the final but most important parts of the ductless HVAC installation timeline GTA. The technician should verify that indoor and outdoor units communicate properly, controls respond correctly, airflow is strong, heating and cooling modes operate as expected, and the drainage system functions without leaks.
For multi-zone systems, every indoor unit should be tested. Go Ductless Inc. also explains system operation to the homeowner, including remote controls, fan settings, temperature adjustment, filter cleaning, and basic maintenance. The ductless HVAC installation timeline GTA should always include this final walkthrough because installation is not truly complete until the homeowner understands how to use the system correctly.
Final Performance Check
A technician should confirm that the system is delivering the intended comfort before leaving. This final check helps identify any small issue while the installation crew is still on site.
How Long Do Multi-Zone Systems Take?
Multi-zone systems naturally require more time because there are more indoor units to mount, connect, drain, wire, and commission. A ductless HVAC installation timeline GTA for a larger system may extend across multiple working days depending on the number of zones and property layout. A two-zone system in a compact home may be relatively straightforward, while a four-zone system across three floors requires much more planning and labour.
The outdoor unit must also be properly matched to the connected indoor units, and each zone needs to be tested individually. Refrigerant lines may travel in different directions through the home, which increases routing complexity. When evaluating the ductless HVAC installation timeline GTA for a multi-zone project, homeowners should expect the contractor to prioritize proper design and testing rather than trying to complete several zones at the speed of a single-room installation.
Shared Outdoor Capacity
Multi-zone systems share outdoor capacity among the connected indoor units, which makes equipment matching especially important. A professional installation should include enough time to verify that every zone performs as intended.
How Homeowners Can Prepare For Installation Day
Homeowners can help shorten the ductless HVAC installation timeline GTA by preparing indoor and outdoor work areas before the crew arrives. Furniture should be moved away from planned indoor unit walls, fragile objects should be removed, and access to the electrical panel should remain clear. Outdoor pathways should also be free of obstacles so equipment and tools can be moved safely.
Pets and young children should stay away from work areas because doors may remain open and power tools will be in use. Homeowners should also confirm indoor unit placement before work begins. Changing positions after drilling starts can create unnecessary delays. Good preparation supports a smoother ductless HVAC installation timeline GTA and allows the crew to focus on installation rather than clearing access.
Confirm Your Installation Plan
Before the project begins, confirm the location of indoor units, outdoor equipment, line covers, drainage points, and electrical components. Clear communication reduces last-minute changes.
Does Installation Time Affect Quality?
A shorter project is not automatically better. The ductless HVAC installation timeline GTA should allow enough time for correct mounting, refrigerant connections, electrical work, drainage, pressure testing, vacuuming, commissioning, and homeowner training. Skipping these steps to finish faster can create performance problems that require future repairs or adjustments.
At the same time, an experienced installer should work efficiently and avoid unnecessary delays. The goal is not to make the installation slow, but to give each stage the time it requires. Go Ductless Inc. focuses on an organized ductless HVAC installation timeline GTA that balances efficiency with technical accuracy and clean workmanship.
Quality Before Speed
Homeowners should choose installers based on planning, technical process, and workmanship rather than the shortest promised timeline.
Energy Efficiency After Installation
Once installation is complete, energy performance depends on more than the equipment itself. Natural Resources Canada explains that heat pumps transfer heat and can provide both heating and cooling. A properly selected Ductless Heat Pump can therefore provide efficient year-round comfort, but actual results depend on sizing, home insulation, operating habits, and maintenance.
NRCan’s Heat Pump Basics resource is useful for homeowners who want to understand how the technology works. After the ductless HVAC installation timeline GTA is complete, steady setpoints, clean filters, good airflow, and reasonable temperature settings can help support system performance.
Efficient Operation Starts With Proper Installation
Even highly efficient equipment can perform poorly if installation quality is weak. Correct setup provides the foundation for reliable long-term operation.
Indoor Air Quality And Ventilation
Ductless equipment heats or cools indoor air, but it does not automatically provide fresh outdoor air. Health Canada explains that ventilation can help remove indoor pollutants and bring fresh air into the home. After the ductless HVAC installation timeline GTA is completed, homeowners should continue following appropriate ventilation practices alongside their new system.
Health Canada’s indoor air quality guidance is available. Filters inside ductless units should also be checked and cleaned according to manufacturer instructions so airflow remains strong.
Keep Filters Clean
Clean filters support airflow and comfort. Homeowners should inspect them regularly, especially during heavy cooling or heating seasons.
Why Choose Go Ductless Inc.
Go Ductless Inc. approaches the ductless HVAC installation timeline GTA as a complete process rather than only an installation-day task. We begin with assessment and zone planning, then consider equipment sizing, indoor placement, outdoor location, electrical requirements, line routing, drainage, testing, and final commissioning. This planning helps homeowners understand what the project involves and reduces unexpected delays once installation begins.
We also help homeowners choose the service option that matches their comfort goals. A Mini Split may be ideal for one targeted room, while Ductless Air Conditioning can address summer comfort across several areas. A Ductless Heat Pump can provide both heating and cooling for year-round use. For homeowners interested in premium residential equipment, Mitsubishi Electric M-Series options can also be considered. Our goal is to create a realistic ductless HVAC installation timeline GTA while delivering dependable comfort and clean workmanship.
Plan Your GTA Ductless HVAC Installation Timeline With Go Ductless Inc.
The ductless HVAC installation timeline GTA depends on system size, number of zones, line routing, wall type, electrical work, drainage, outdoor access, and testing requirements. A simple single-zone project may often be completed in a day, while multi-zone installations can require additional time. The best project is not necessarily the fastest one. It is the one that includes careful placement, proper refrigerant work, reliable drainage, safe electrical connections, commissioning, and homeowner training.
If you are planning a ductless HVAC installation timeline GTA project, contact Go Ductless Inc. for a professional assessment. We can review your home, recommend the right system design, and give you a clearer understanding of how long your installation should take. Whether your project involves a Mini Split, Ductless Air Conditioning, Ductless Heat Pump, or Mitsubishi Electric M-Series solution, thoughtful planning can help make the installation process smooth and the finished system comfortable for years to come.
Frequently Asked Questions
-
How long is the typical ductless HVAC installation timeline GTA?
A simple single-zone ductless HVAC installation timeline GTA may often fit within one working day, while larger multi-zone projects can take longer. -
What can extend the ductless HVAC installation timeline GTA?
Multiple zones, difficult wall materials, long refrigerant lines, electrical upgrades, condensate pumps, and complicated outdoor access can all increase installation time. -
Does a multi-zone ductless HVAC installation timeline GTA take longer?
Yes. Multi-zone systems usually take longer because every indoor unit requires mounting, line routing, drainage, wiring, and commissioning. -
Can electrical work affect the ductless HVAC installation timeline GTA?
Yes. New circuits, panel limitations, disconnect installation, or long wiring routes can add time to the project. -
Is pressure testing part of the ductless HVAC installation timeline GTA?
Yes. Professional installation should include pressure testing, vacuuming, startup, and commissioning before the system is considered complete. -
Can homeowners shorten the ductless HVAC installation timeline GTA?
Yes. Clearing work areas, confirming unit locations in advance, and providing access to the electrical panel and outdoor area can help the project move smoothly. -
When should I contact Go Ductless Inc. about a ductless HVAC installation timeline GTA?
Contact Go Ductless Inc. before installation so your home, zone plan, equipment, electrical needs, and expected project timeline can be reviewed properly.